Home Teeth Whitening Tips
For my best home teeth whitening tips, I have distilled all the recommendations from the various manufacturers, and included some tips of my own that I have picked up over the years.
These tips are mainly to do with home whitening kits provided by your dentist.
But most will also apply to home teeth whitening kits you can get online, such as the Auraglow home whitening system at Amazon.
Your dentist will give you his own home teeth whitening tips, but I hope my own advice here will help to fill in any blanks!
First things first.
Your dentist will take molds of your teeth, and send these off to a dental laboratory to have the custom teeth whitening splints made. (sometimes these are called teeth whitening trays or teeth whitening mouth guards.)
These are very thin, clear, flexible silicone or plastic shields that fit over your teeth and hold the teeth whitening gel in position.
If you want a good whitening experience, it is critically important that these splints fit precisely.
Home Teeth Whitening Tips
My recommendation?
Auraglow. If you don't want to go to the dentist, and want to use an online product from Amazon, this home teeth whitening system gives you professional-quality results at a lower cost than going to the dentist. You can order it online from the Amazon website.
How to tell if your splints fit precisely?
Home teeth whitening tip 1 - It's a good sign if your dentist has to take two or three molds of your teeth before he's satisfied. It shows he is taking his time and being critical of his own work.
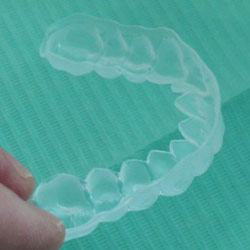 whitening splint
Of course, usually the first set of molds are fine, but if your dentist has to take another one, don't worry!
Home teeth whitening tip 2 - A few days later, when he puts the splints over your teeth for the first time, to check how well they fit, he should be able to tell pretty quickly, usually within ten seconds.
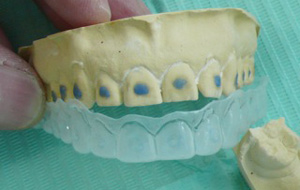 whitening splint
If he takes longer than that, and keeps looking at one area in particular, it MAY mean there's a small gap between the splint and your gum, and he's wondering if it will be OK or whether he should start over.
My advice?
He should start over!
When you get home, take out your splints and have a look at them. There are different designs - some will go up over the gum a little bit, other designs will be trimmed to a scalloped edge all the way around, to fit snugly against the gum edges.
The first thing now is to figure out which is the splint for your upper teeth and which for your lower teeth. You should be able to see that the splint for the upper teeth has bigger front teeth (incisors), and the lower has smaller front teeth.
Now try the upper one in, without any gel. Put it over your teeth gently; you may have to shuffle it a little bit left-and-right until it lines up with your own teeth, then it should "drop" over your teeth.
Now push it up firmly with your thumbs to make sure it's fully seated. Now get real close to a mirror, and look closely at the outer edges, where the splint meets your gums.
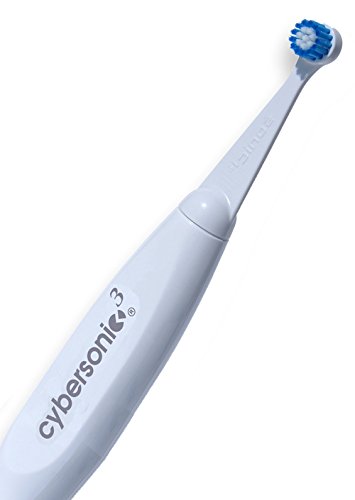
Remember to check out my top recommended electric toothbrush, which has the best performance and a great price at Amazon - the Cybersonic 3 brush.
Home teeth whitening tip 3; Push gently at the edge. The edge of the splint should fit very snugly against the gum, there must be NO gaps or spaces. If there are, then the gel can leak out, and possibly irritate your gums.
Also, saliva can get IN, diluting the gel and reducing it's effect on your teeth. Do the same with the splint for your lower teeth. If you think there are gaps, the whitening will not work as well as it should!
My advice?
Take them back, and ask him to start over!
IF EVERYTHING LOOKS GOOD, let's get started!I will talk about the upper splint here, but it's the same for both.
Home teeth whitening tip 4; Dry the inside of the splint with a cotton bud to remove any excess water. The splint does not have to be bone dry, but there should not be any puddles of water in it, which could dilute the whitening gel.
Take out the bleach gel syringe, and squeeze a little bit of gel out of the tip, on to a tissue, to get rid of any gel that may have been exposed to the air.
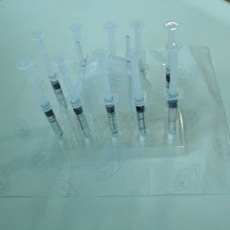 whitening gel syringes
Then aim the tip of the syringe into the inside of the little depression located on the outer surface of each "tooth" on the splint. Squeeze out a SMALL amount of gel (about the size of a grape seed).
Do this for EACH "tooth" in the splint. Do not use more than this. It will not result in any more whitening, and excess gel could irritate the gums.
Now place the splint into position over your teeth, making sure they are firmly in place. Run your finger around the outer edge of the splint, where it meets the gum. If there is any gel coming out here, you have used too much gel!
Don't attempt to take the splint out - it will get very messy - just make a mental note to use a little LESS gel next time. The excess gel will not cause any damage, but you are wasting gel and will get fewer sessions from your syringe.
Leave the splints in place for the recommended time your dentist told you. This used to be overnight, but it has been established that most of the tooth whitening effect takes place within an hour or so, perhaps less.
Home Teeth Whitening Tips
So the up-to-date advice is that 60 minutes is enough. Any longer is unlikely to bring any more whitening - the gel will be exhausted. Your own dentist should also have told you not to eat or drink anything while wearing the splints.
After time is up, remove the splints, and rinse carefully under COLD water, brushing gently with a toothbrush to ensure all the old gel is gone. Then gently brush around you own teeth, to remove any gel that may be left.
Store the splints carefully in the box provided, and keep in a cool place.
The syringe of teeth whitening gel should be kept in the DOOR of your refrigerator. It's important to keep the gel cool at all times! AND I MEAN AT ALL TIMES!
Final Home Teeth Whitening Tip; DO NOT drink coffee, tea, soda, or eat anything highly colored (such as curry), or smoke a cigarette for at least one hour after taking the splints off! Your tooth enamel is much more likely to "soak up" any staining at this time.
After an hour, saliva has had a chance to get into the enamel surface and seal it off.
Just one more Home Teeth Whitening Tip! It's best to avoid all the "staining" things listed above as much as possible during the week or two of home teeth whitening - it tips the balance in your favor!
And, now your teeth are white, you want to keep them really clean - WITH A GREAT TOOTHBRUSH!
For a few more tips on how to make your teeth look great, go to my page titled "5 Ways To Improve Your Smile".
